|
In GridView Control, the
ItemDataBound Event is replaced by RowDataBound Event and some new events are
also added.
DataSource
Controls
SqlDataSource
Control
It provides data access
through data stores that understand the SQL syntax. This includes databases such
as Microsoft SQL Server, Microsoft Access, Oracle, and so on.
ObjectDataSource
It provides data access through a developer-created
class. (Well architected Web applications oftentimes have a set of classes that
provide methods to manipulate or retrieve the data from an underlying data
store. These classes provide a layer of encapsulation, hiding the details of the
underlying data store.)
XmlDataSource
It provides data access to
XML document.
Using DataSource Controls
with GridView
SqlDataSource
Control
1) Drag a SqlDatasource
and GridView control from the tool box.
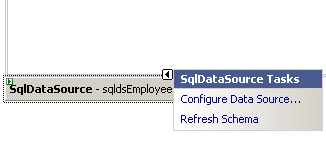
2) Now Configure the SqlDatasource
from “SqlDatasource Task” by clicking “Configure DataSource” as shown in the
below figure.
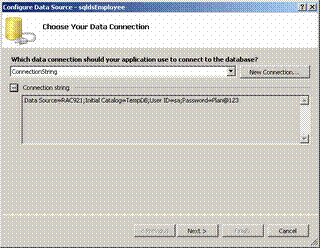
3) This will open a window
where you can specify the connection string if there is already one in
web.config file or you can click the new connection to build a connection string
to connect to the database. Click Next.
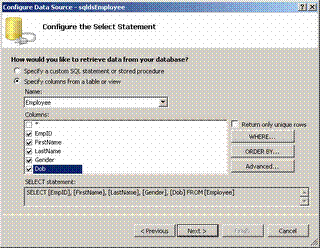
4) Here you can specify a custom query or stored
procedure to get the data from database or you can select “specify table or
view” radio button to select the table you want to display as shown in
figure.
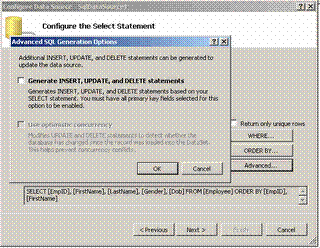
5) To configure edit, update and delete operation in
Gridview we have to specify the query. The above one will only select the data
from database. For configuring edit/update/delete, click “Advanced” button and
check the “Generate Insert, Update and Delete statements” and click Ok. Refer
the below figure. Click Next.
6) Click Finish. Now we have to configure the GridView
Control to accept the data from the Datasource Control. We have to set the
DataSourceID of the Gridview control to the ID of the SqlDataSource Control. To
make the Delete Command to work we have to specify the DataKeyNames property to
the primary key field name of the database table(Empid in our example).To
specify the Paging, Sorting, Edit and update select enable paging, sorting,
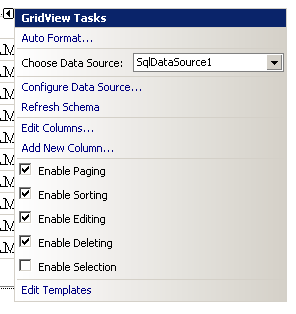
editing, deleting in Gridview tasks as shown in the figure.
7) Run the Application.
|
|
|
Master/Detail in
GridView
1) Drag a DropDownList and
bind the EmpID from the database using a SqlDataSource control by configuring it
in the same way as we did for the Gridview.
2) Drag a GridView and configure
SqlDataSource control to display the Details data.
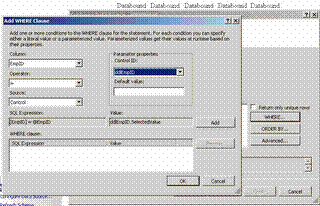
3) Click “Configure
DataSource” to specify the connection string, click next. In the Next screen you
need to specify the columns to display in the detail Gridview. Here you will
find a “Where” button and clicking the button will open a new window like the
one shown below figure where you can configure the filter condition. Select a
column from the “Column” dropdownlist which lists all the columns from Employee
table. Select the appropriate operator i.e. “=” in our example. Select the
source that will give you the data for the filtering condition for your query
and it is dropdownlist in our example so select Control from the “Source”
dropdownlist. Select ID of the dropdown in ControlID dropdown, provide default
data if necessary and click "ADD" and then “OK”. In the Parent window, click
next and then finish to complete.
4) Make AutoPostBack Property of the EmpID dropdownlist
to true.
5) Run the application.
|