|
18. Add the Managed Property “Rating” to the Column
Names.
19. Next, we will have to edit the XSL for the result
item template.
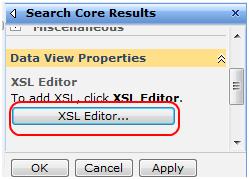
20. Expand the “Data View Properties” tool part, and
click “XSL Editor”
21. Locate in the XSL the template “<xsl:template
match="Result">” and update it to look like this:
<!-- This template is called for each result -->
<xsl:template match="Result">
<xsl:variable name="id" select="id">
<xsl:variable name="url" select="url">
<span class="srch-Icon">
<a href="{$url}" id="{concat('CSR_IMG_',$id)}"
title="{$url}">
<img align="absmiddle" src="{imageurl}" border="0"
alt="{imageurl/@imageurldescription}" />
</a>
</span>
<span class="srch-Title">
<a href="{$url}" id="{concat('CSR_',$id)}"
title="{$url}">
<xsl:choose>
<xsl:when test="hithighlightedproperties/HHTitle[. !=
'']">
<xsl:call-template name="HitHighlighting">
<xsl:with-param name="hh"
select="hithighlightedproperties/HHTitle">
</xsl:call-template>
</xsl:when>
<xsl:otherwise><xsl:value-of
select="title"></xsl:otherwise>
</xsl:choose>
<xsl:if test="rating > 0">
User Rating: <b><xsl:value-of
select="rating"></b>
</xsl:if>
</a>
<br/>
</span>
<xsl:choose>
<xsl:when test="$IsThisListScope = 'True' and
contentclass[. = 'STS_ListItem_PictureLibrary'] and picturethumbnailurl[. !=
'']">
<div style="padding-top: 2px; padding-bottom:
2px;">
<a href="{$url}" id="{concat('CSR_P',$id)}"
title="{title}">
<img src="{picturethumbnailurl}" alt="" />
</a>
</div>
</xsl:when>
</xsl:choose>
<div class="srch-Description">
<xsl:choose>
<xsl:when test="hithighlightedsummary[. != '']">
<xsl:call-template name="HitHighlighting">
<xsl:with-param name="hh"
select="hithighlightedsummary">
</xsl:call-template>
</xsl:when>
<xsl:when test="description[. != '']">
<xsl:value-of select="description">
</xsl:when>
</xsl:choose>
</div >
<p class="srch-Metadata">
<span class="srch-URL">
<a href="{$url}" id="{concat('CSR_U_',$id)}"
title="{$url}" dir="ltr">
<xsl:choose>
<xsl:when test="hithighlightedproperties/HHUrl[. !=
'']">
<xsl:call-template name="HitHighlighting">
<xsl:with-param name="hh"
select="hithighlightedproperties/HHUrl">
</xsl:call-template>
</xsl:when>
<xsl:otherwise><xsl:value-of
select="url"></xsl:otherwise>
</xsl:choose>
</a>
</span>
<xsl:call-template name="DisplaySize">
<xsl:with-param name="size" select="size">
</xsl:call-template>
<xsl:call-template name="DisplayString">
<xsl:with-param name="str" select="author">
</xsl:call-template>
<xsl:call-template name="DisplayString">
<xsl:with-param name="str" select="write">
</xsl:call-template>
<xsl:call-template
name="DisplayCollapsingStatusLink">
<xsl:with-param name="status"
select="collapsingstatus">
<xsl:with-param name="urlEncoded"
select="urlEncoded">
<xsl:with-param name="id"
select="concat('CSR_CS_',$id)">
</xsl:call-template>
</p>
</xsl:template>
22. You can only add the following to the existing XSL you
already had there instead of pasting the entire tag:
<xsl:if test="rating > 0">
User Rating: <b><xsl:value-of
select="rating"></b>
</xsl:if>
23. And you should get results that will resemble
this:

24. For debugging reasons, should you wish to view the
results RAW XML, copy the existing XSL to notepad for backup, and use this XSL
instead:
<?xml version="1.0" encoding="UTF-8"?>
<xsl:stylesheet version="1.0"
xsl="http://www.w3.org/1999/XSL/Transform">
<xsl:output method="xml" version="1.0"
encoding="UTF-8" indent="yes">
<xsl:template match="/">
<xmp><xsl:copy-of
select="*"></xmp>
</xsl:template>
</xsl:stylesheet>
|